3d model rendered in maya. it features a turnaround of a cyber soldier futuristic character with a black and red unique helmet. it has front back and 3/4 view

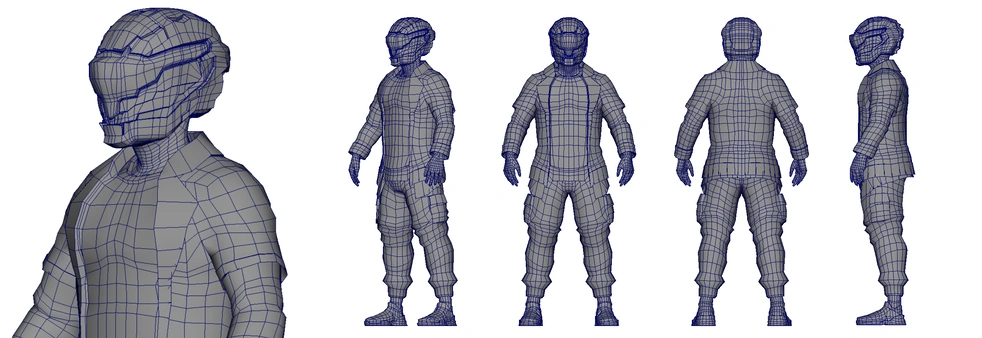
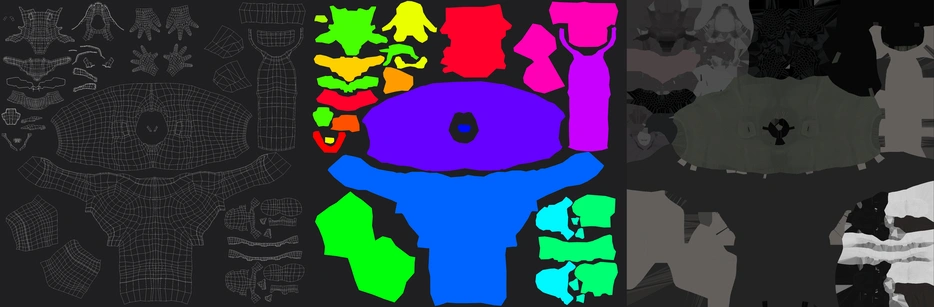
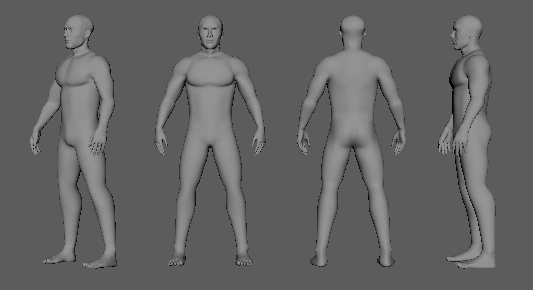
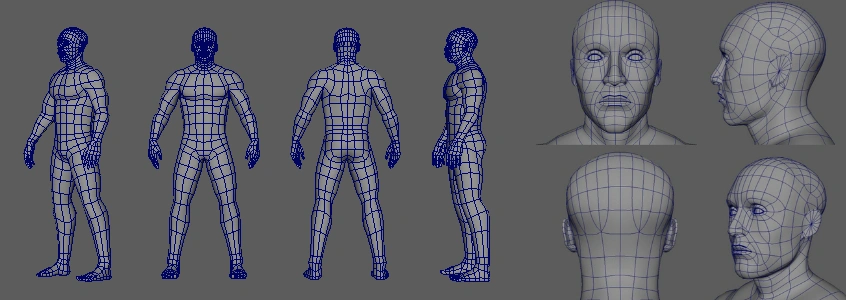
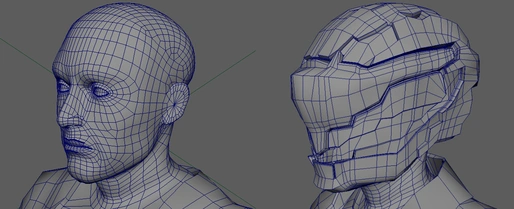
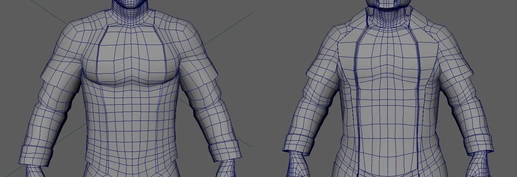
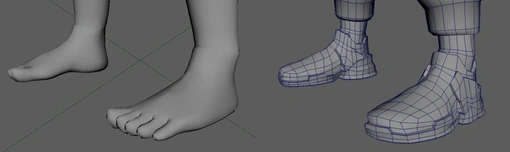
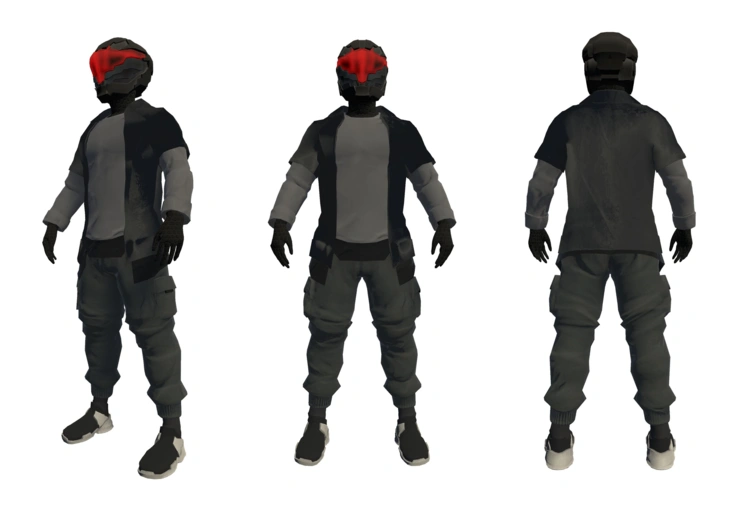
Cyber Soldier was a two-week exercise, turning an initial character thumbnail sketch into a polished model made in Maya and textured in Substance Painter, imported and rendered in Unity. This was my first time making a 3D character model and using Substance Painter. I learned a lot about unwrapping human figures and editing clothing textures and folds! The image you see on the right is the final product, and the pictures were taken using a plug-in in Unity.

Wireframe Views

maya render of 3d model of a futuristic cyber punk soldier. it has a close up of the helmet and upper body, and full front, back, side, and quarter views. the render is untextured wireframe

Wireframe turn around of the model

UV Map, ID Map, Texture Map

images of the 3d model of a futuristic cyber punk soldier. theres a uv map, an id map, and a texture map

Maps of the model

Process

digital drawing of 3 different unique silhouetted characters. one is a humanoid cyber punk futuristic soldier wielding a pole. one is a mutant crocodile bipedal warrior with a big scrap hook weapon. one is an elegant dog humanoid butler

3 Character Silhouette Exercise

I started off with creating three character silhouettes, each from the same world I created prior, but from different factions/areas. On the left, is a cyberpunk-futuristic-soldier from the militia of the authoritarian power known as (SNCTN) that exists in this futuristic dystopian world. In the middle is an abandoned science experiment from the research branch of SNCTN that was dumped and raised in The Scrapyard, which is essentially the outskirts of the main city. This is where all the trash and scrap is discarded, a no man’s land. The right is a butler from the aristocratic society that exists in the upper echelons of the main city. From here, I chose to model the most human-looking (the cyber soldier) for my first model in order to learn the basic forms.


screenshots in maya viewport of a human model. it is a turnaround of several full body views. there is a quarter view, front, back, and side view

Initial Model

Believe it or not, I actually started off the model by creating a base human model, so even though the final covers up the face and feet, I did model those. I set up my human reference so that each image corresponded to the camera angle in order to stay true to proportion. This process took the longest, as I wanted the base to be rig-ready, so everything was made with preserving edge loops in mind. I was extra attentive about good topology all throughout, but especially in the face — even though it gets covered by a helmet at the end haha. These wireframes are pre-subdividing the model.


screenshots in maya viewport of a human model. it is a turnaround of several full body views. there is a quarter view, front, back, and side view. they are all in wireframe view. there is an additional close up on the head and face topology. there are the same kinds of views for the turnaround

Wireframe turn around of the model


close up wireframe mesh comparison screenshots in maya viewport of a human model head. it depicts a human head before and after having a helmet replace the head mesh

Replacing head with helmet

I deleted the detailed head and started off with a primitive shape, adding more detail through specific extrusions in order to build up into this helmet shape. I wanted there to be a very big visor, as I feel that is a big indicator of cyberpunk fashion. I made the decision to remove a face in general to push the idea that this character is a soldier and not an individual.


close up wireframe mesh comparison screenshots in maya viewport of a 3d model humanoid torso. it depicts the torso before and after adding a jacket mesh to the torso

Adding shirt and jacket to the torso

The jacket and shirt took some time, as I needed to preserve the loops around the collar area while visually communicating that the area was a collar. I also had some trouble with the area around the waist, where the clothes would hang off the body, but I got the hang of it and created a layered clothing look off of the single mesh.


close up wireframe mesh comparison screenshots in maya viewport of a 3d model humanoid legs. it depicts the legs before and after adding a futuristic punk pants mesh to the legs

Adding pants to the legs

I am extra proud of how the cargo pants turned out. There wasn’t too much alteration with the mesh; it was just an initial extrusion and then scaling at certain rotations for the silhouette of baggy pants. Creating the pockets for the pants was a small challenge because of my concern for topology, but I am glad I went through with it because the silhouette of the pants looks so good.


close up wireframe mesh comparison screenshots in maya viewport of a 3d model humanoid feet. it depicts the feet before and after adding a futuristic shoe mesh to the feet

Adding shoes to the feet

I actually had to delete the mesh for the feet and add a new, simpler mesh to create the shoe. From there, it was just extruding the shoe sole. I opted out of laces to fit the cyberpunk theme.